
Introduction: Why Go Beyond Security Defaults
The Security Defaults constitute an excellent entry point for organizations starting their multi-factor authentication strategy in Microsoft Entra ID. Easy to enable with no configuration required, they cover the most critical scenarios. But as your environment grows more complex — service accounts, application-specific compliance requirements, location-based rules — their limitations quickly become an operational constraint.
This article is the second part of a series dedicated to securing Microsoft Entra ID through MFA and conditional access policies. We analyze the shortcomings of Security Defaults, break down the anatomy of a conditional access policy, and guide you step-by-step through creating and activating your first policy in the Entra ID portal.
Series Context
This article follows an introduction to MFA in Microsoft Entra ID. If you are new to this topic, we recommend consulting the fundamentals of multi-factor authentication in M365 first before continuing.
Why Security Defaults Reach Their Limits
Security Defaults are designed for simplicity — that's their strength, but also their main constraint. Here's what they don't allow you to do:
- Exclude specific users or groups (service accounts, break-glass accounts)
- Target individual cloud applications (Exchange Online, SharePoint, etc.)
- Adapt requirements based on context: geographic location, device state, sign-in risk level
In short, Security Defaults operate in an all-or-nothing mode. For a small organization with homogeneous needs, this compromise is acceptable. Once a service account cannot register for MFA, or a compliance requirement applies only to certain applications, conditional access becomes the appropriate solution.
Microsoft Reference: Security Defaults Overview
Licenses Required for Conditional Access
Before creating your first policy, verify your eligibility. Conditional access requires Microsoft Entra ID P1 or P2, included in the following plans:
- Microsoft 365 Business Premium
- Microsoft 365 E3 and E5
- Azure AD Premium P1 / P2 as a standalone license
- Temporary trial available in most tenants
Tip
To check active licenses in your tenant, go to the Licenses panel in the Microsoft Entra ID portal before starting any configuration.
Microsoft Reference: License Requirements for Conditional Access
Security Defaults and Conditional Access: Coexistence Impossible
This is a fundamental point to understand first: Security Defaults and conditional access policies cannot function simultaneously. The transition requires disabling Security Defaults first, which creates a temporary window without MFA enforcement. It is therefore essential to chain the steps quickly to minimize this exposure.
Important
Disabling Security Defaults without immediately activating a conditional access policy exposes your tenant to a period without mandatory MFA. Plan this transition carefully and prefer a low-activity time window.
The Anatomy of a Conditional Access Policy
Every conditional access policy relies on an if-then logic: if these conditions are met, then apply these controls. It is built around three fundamental components.
Assignments
Define who and what the policy applies to:
- Users: all users, specific groups, or directory roles (e.g., Global Administrator)
- Exclusions: ability to exclude individual accounts or groups — a feature absent from Security Defaults, essential for break-glass accounts
- Target resources: all cloud applications, or specific applications like Exchange Online or SharePoint
Conditions
Define when and how the policy applies. This is where conditional access demonstrates its full power:
- Sign-in risk level
- Geographic location of the user
- Device platform (Windows, iOS, Android...)
- Client application type (browser, native client, etc.)
- Device compliance or Entra ID join status
For a first policy, these conditions can remain at their default values for universal enforcement.
Access Controls
Define what happens when the policy is triggered:
- Grant access with requirements: MFA, compliant device, specific authentication strength
- Block access entirely
Microsoft Reference: Components of a Conditional Access Policy
Report-Only Mode: Your Safety Net
Before activating any conditional access policy, it is essential to understand Report-Only mode. It's one of the most valuable features of conditional access, and the reason no policy should ever be activated directly without a testing phase.
In Report-Only mode, the policy evaluates each real sign-in and logs what it would have done — without enforcing anything on users. You get complete visibility into the potential impact before any production deployment. It's the mechanism that protects you against misconfigurations and account lockout risks.
Warning
Never directly activate a new policy in On mode without first validating it in Report-Only mode. A misconfiguration can lock out legitimate users, or even the administrator themselves.
Microsoft Reference: Report-Only Evaluation Results
Deploying Your First MFA Policy: Step-by-Step Guide
Good to Know
These steps should ideally be performed in a test or lab environment before any production changes.
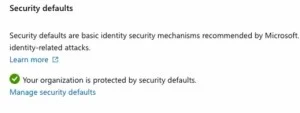
Disable Security Defaults
Log in to the Azure portal and navigate to Microsoft Entra ID.
- Select Properties in the Manage menu
- Scroll to the bottom and click Manage security defaults settings
- Toggle the switch to Disabled
- Select the appropriate reason (e.g., My organization plans to use conditional access)
- Click Save
Create the Conditional Access Policy
In the Entra ID portal, navigate to Security > Conditional Access > Policies, then click New policy.
- Name: Use a clear naming convention, for example
Require MFA for All Users. A consistent naming standard becomes crucial as the number of policies increases. - Assignments > Users: Select All users. Use the Exclude tab to add break-glass or service accounts.
- Target resources: Select All resources
- Network and Conditions: Leave the defaults for this first policy
- Access Controls > Grant: Check Require multi-factor authentication, then click Select
- Enable policy: Set to Report only
- Click Create

Analyze Logs in Report-Only Mode
Once the policy is in Report-Only mode and after generating sign-in activity:
- Open the Sign-in logs from the Conditional Access panel > Monitoring
- Open a log entry and go to the Conditional Access tab
- The status will show Not applied as long as the policy is not activated
- Check the Report only tab to see the details: assignment matches, conditions evaluated, action that would have been required
This analysis allows you to validate the policy behavior before any production deployment.
Use the What If Tool
The What If tool allows you to simulate the application of policies for a specific user without waiting for an actual sign-in.
- From the Conditional Access Policies panel, click What If at the top of the screen
- Select a target user
- Define the target application, device type, and client application
- Click What If to see which policies would apply and what controls would be enforced
This tool is particularly useful for validating expected behavior for administrative accounts or users with exclusions.
Activate the Policy in Production
Once the policy is validated in Report-Only mode:
- Return to the policies list and open the created policy
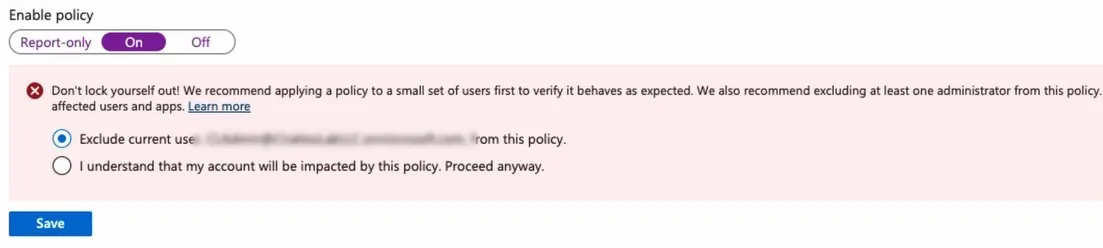
- Toggle Enable policy from Report only to On
- Carefully read the lockout warning. It is recommended to keep the current user in exclusions during this step to prevent tenant lockout.
- Click Save
Once the policy is active, any non-excluded user will be prompted to authenticate with MFA at their next sign-in. Users not yet registered will be guided through the registration process directly during sign-in.
Summary of Key Components
| Feature | Security Defaults | Conditional Access |
|---|---|---|
| Activation | Simple toggle | Manual configuration |
| User exclusions | No | Yes |
| Application targeting | No | Yes |
| Location-based rules | No | Yes |
| Risk assessment | No | Yes (P2) |
| Report-Only mode | No | Yes |
| Required license | None | Entra ID P1/P2 |
Next Steps Toward a Zero Trust Posture
With your first conditional access policy in place and MFA enforced across your tenant, you're laying the foundations for a Zero Trust architecture. But this first policy is just the starting point. The scenarios to address next include:
- Blocking legacy authentication — a frequently exploited attack vector
- Location-based access restrictions to limit sign-ins from unauthorized geographic zones
- Enhanced protection of privileged accounts through dedicated policies for administrative roles
- Break-glass account configuration to ensure emergency access to the tenant in case of lockout
Microsoft Reference: Planning a Conditional Access Deployment
Tip
For environments requiring advanced protection, consider combining conditional access with Microsoft Entra ID Protection (P2) to integrate user risk and sign-in risk assessment directly into your policies.
References and Additional Resources
- Microsoft Documentation: Conditional Access Overview
- Microsoft Documentation: Security Defaults
- Microsoft Documentation: Report-Only Mode
- Microsoft Documentation: What If Tool
- Microsoft Documentation: Plan a Conditional Access Deployment
- Microsoft Documentation: Emergency Access Accounts (Break-Glass)