Introduction
Monitoring configuration drift represents a major challenge for Microsoft 365 administrators. Unauthorized or accidental changes can compromise the security and compliance of your environment. Microsoft addresses this need with Unified Tenant Configuration Management (UTCM), a native solution that revolutionizes configuration management.
Good to know
UTCM is currently in public preview and allows you to monitor more than 300 different types of resources in your Microsoft 365 tenant.
This article guides you step by step through implementing UTCM using PowerShell, from initial configuration to drift detection.
UTCM Architecture and Components
Before diving into configuration, let's understand UTCM architecture which is built on three fundamental pillars:
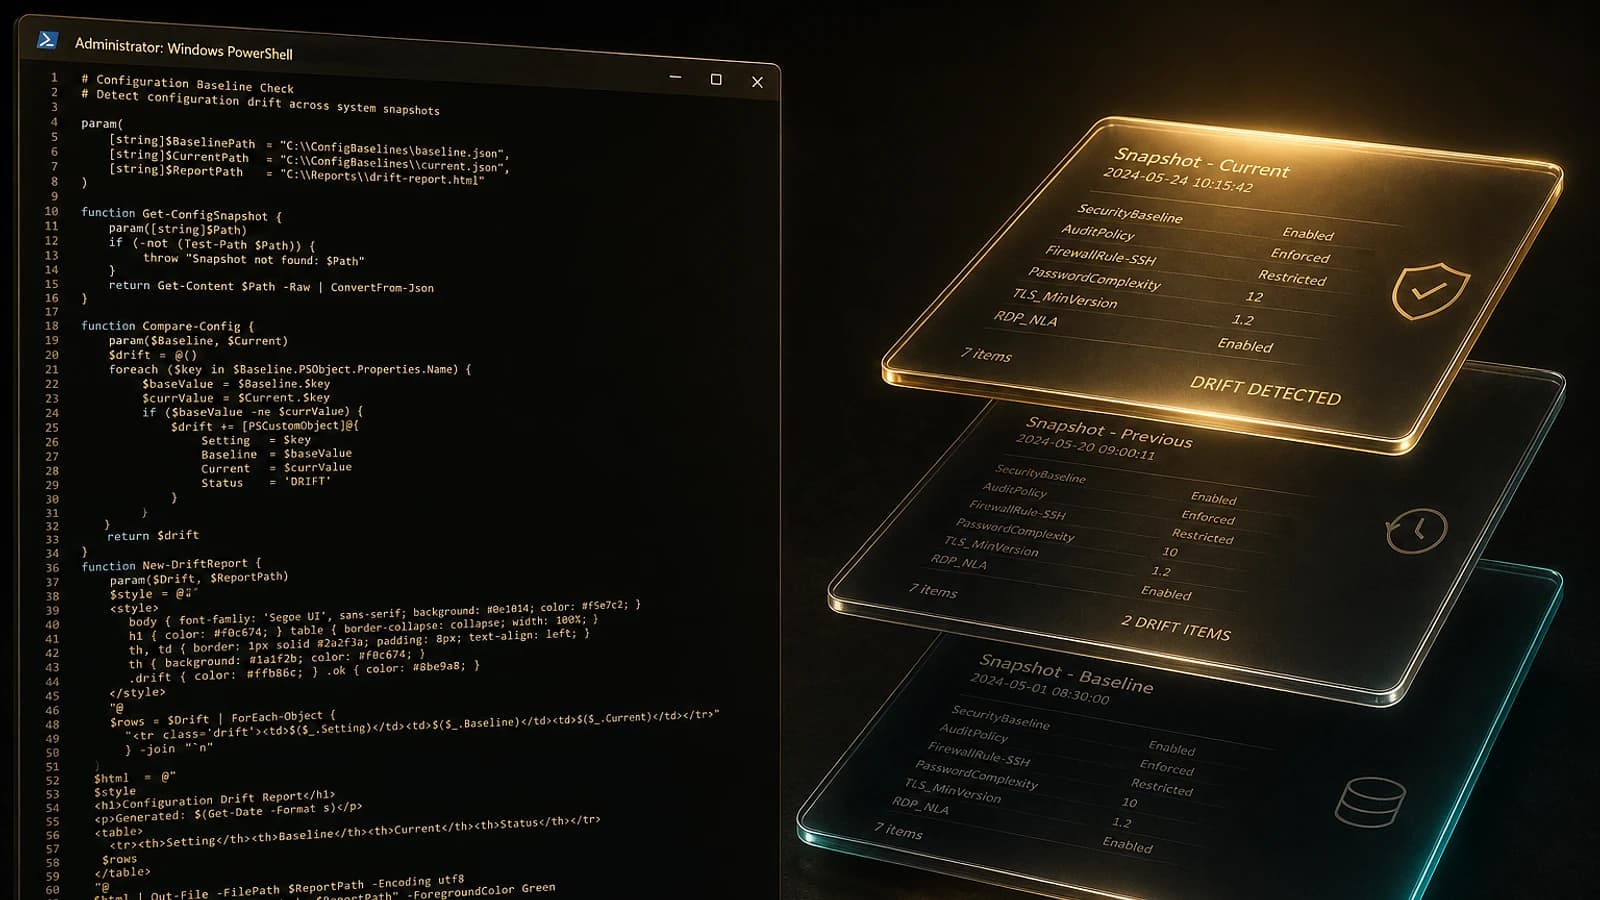
Snapshots
Snapshots capture the state of your resources at a given moment. They constitute your reference, your desired state. Think of it as a photograph of your conditional access policies or Exchange rules at a time when everything is perfectly configured.
Monitors
Monitors are the surveillance engine. They periodically compare the current state of your tenant with the reference snapshot. By default, this check runs every 6 hours.
Drifts
Drifts represent the gaps detected between the current state and the reference state. For example, if the name of a conditional access policy has been modified, UTCM will report it as a drift.
Caution
The current limitations of the UTCM API are documented on Microsoft Learn. Make sure to review them before planning your large-scale implementation.
Technical Prerequisites
Before beginning implementation, ensure you have the following:
- PowerShell 7 or later installed on your workstation
- An account with the Global Administrator role in your tenant
- Microsoft Graph PowerShell modules installed
Installing PowerShell 7
If PowerShell 7 is not already installed, download it from Microsoft's official website. Complete installation documentation is available on Microsoft Learn.
Connecting to Microsoft Graph
Connect to Microsoft Graph with the necessary permissions:
1Connect-MgGraph -Scopes 'ConfigurationMonitoring.ReadWrite.All'UTCM Authentication Configuration
UTCM uses a dedicated service principal which allows it to access resources to be monitored. This approach ensures a clear separation of privileges and enhanced security.
Tip
During the public preview phase, you must manually create this service principal. This step will likely be automated in the final version.
Installing Required Modules
Install the Microsoft Graph authentication module:
1Install-Module Microsoft.Graph.AuthenticationConnecting with Appropriate Permissions
Connect with the permissions necessary to create the service principal:
1Connect-MgGraph -Scopes 'Application.ReadWrite.All'Creating the UTCM Service Principal
Run the following script to create the service principal and assign it the required permissions:
1# Creating the service principal2$body = @{3 appId = "03b07b79-c5bc-4b5e-9bfa-13acf4a99998"4}5Invoke-MgGraphRequest -Uri "v1.0/servicePrincipals" -Method POST -Body $body6 7# Assigning permissions8$permissions = @('Policy.Read.All', 'Policy.ReadWrite.ConditionalAccess')9$graph = Invoke-MgGraphRequest -Uri "v1.0/servicePrincipals?`$filter=appId eq '00000003-0000-0000-c000-000000000000'" -Method GET -OutputType PSObject | Select -Expand Value10$utcm = Invoke-MgGraphRequest -Uri "v1.0/servicePrincipals?`$filter=appId eq '03b07b79-c5bc-4b5e-9bfa-13acf4a99998'" -Method GET -OutputType PSObject | Select -Expand Value11 12foreach ($requestedPermission in $permissions) {13 $AppRole = $Graph.AppRoles | Where-Object { $_.Value -eq $requestedPermission }14 $body = @{15 appRoleId = $AppRole.Id16 resourceId = $Graph.Id17 principalId = $UTCM.Id18 } | ConvertTo-Json 19 20 Invoke-MgGraphRequest -Uri "/v1.0/servicePrincipals/$($UTCM.Id)/appRoleAssignments" -Method POST -Body $body21}Creating a Reference Snapshot
The snapshot constitutes your baseline, your reference state. It is crucial to capture it when your resources are in the desired state.
Important
Ensure that your configurations are in the desired state before creating the snapshot. Any future drift will be measured against this reference state.
Capturing Conditional Access Policies
To create a snapshot of your current conditional access policies:
1$uri = "beta/admin/configurationManagement/configurationSnapshots/createSnapshot"2$body = @{3 displayName = "Conditional Access Baseline"4 description = "Criticial CA policies"5 resources = @(6 "microsoft.entra.conditionalaccesspolicy"7 )8}9Invoke-MgGraphRequest -Uri $uri -Method POST -Body $bodyCapturing Multiple Resource Types
To capture multiple resource types simultaneously, simply extend the resources array:
1resources = @(2 "microsoft.entra.conditionalaccesspolicy",3 "microsoft.entra.authenticationmethodpolicy"4)Caution
Each additional resource type requires specific permissions for the UTCM service principal. For example, monitoring authentication methods requires the Policy.Read.AuthenticationMethod permission.
Setting Up Monitoring
Once the snapshot is created, configure monitoring to actively monitor drifts.
Retrieving the Snapshot
First retrieve the information of the created snapshot:
1# Filtering to locate the desired snapshot2$filter = "displayName eq 'Conditional Access Baseline'"3$uri = "beta/admin/configurationManagement/configurationSnapshotJobs/?`$filter=$filter"4# Retrieving the snapshot5$snapshot = Invoke-MgGraphRequest -Uri $uri -Method GET -OutputType PSObject | Select -Expand Value6# Getting the configuration URI7$resourceLocation = $snapshot[0].resourceLocation8# Retrieving the complete configuration9$resources = Invoke-MgGraphRequest -Uri $resourceLocation -Method GET10$fineResources = $resources | Select displayName, description, resourcesCreating the Monitor
Create the monitor using the snapshot information:
1$uri = "beta/admin/configurationManagement/configurationMonitors"2$body = @{3 displayName = "Conditional Access Monitor"4 description = "Criticial CA policies Monitor"5 baseline = @{6 displayName = $fineResources.displayName7 description = $fineResources.description8 resources = ($fineResources.resources | Select-Object -Property displayName, resourceType, properties)9 }10} | ConvertTo-Json -Depth 1011Invoke-MgGraphRequest -Uri $uri -Method POST -Body $bodyMonitoring and Analyzing Results
Checking Job Status
Monitors run automatically every 6 hours. To view the results:
1# Finding the monitor ID2$filter = "displayName eq 'Conditional Access Monitor'"3$uri = "beta/admin/configurationManagement/configurationMonitors/?`$filter=$filter"4$monitorJob = Invoke-MgGraphRequest -Uri $uri -Method GET -OutputType PSObject | Select -Expand Value5 6# Retrieving the results7$filter = "monitorId eq '$($monitorJob[0].id)'"8$uri = "/beta/admin/configurationManagement/configurationMonitoringResults?`$filter=$filter"9$monitorResults = Invoke-MgGraphRequest -Uri $uri -Method GET -OutputType PSObject | Select -expand Value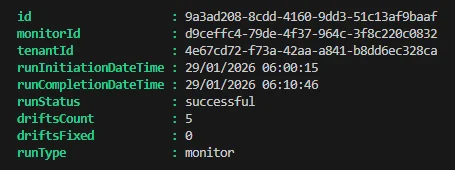
Analyzing Detected Drifts
When drifts are reported, examine them in detail:
1$filter = "monitorId eq '$($monitorJob[0].id)'"2$uri = "/beta/admin/configurationManagement/configurationDrifts/?`$filter=$filter"3$configurationDrifts = Invoke-MgGraphRequest -Uri $uri -Method GET -OutputType PSObject | Select -expand Value
For a detailed view of changes:
1$configurationDrifts | ConvertTo-Json -Depth 10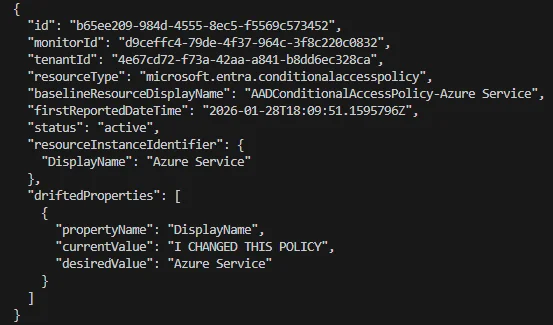
Tip
Converting results to JSON allows you to easily explore nested objects and precisely identify detected changes.
Recommendations and Best Practices
Automation and Integration
While UTCM is powerful, it remains currently a set of APIs. For optimal use:
- Automate drift retrieval and analysis via Azure Automation runbooks
- Integrate alerts into your ticketing or notification system
- Document each snapshot with detailed descriptions to facilitate tracking
Permission Management
| Resource Type | Required Permission | Scope |
|---|---|---|
| Conditional Access | Policy.ReadWrite.ConditionalAccess | Entra ID |
| Authentication Methods | Policy.Read.AuthenticationMethod | Entra ID |
| Exchange Transport Rules | Exchange.ManageAsApp | Exchange Online |
Monitoring Planning
- Create separate snapshots for different resource categories
- Establish a weekly routine for reviewing drifts
- Document legitimate changes to prevent recurring false positives
Conclusion
UTCM represents a significant advancement in proactive Microsoft 365 configuration management. By implementing this solution, you transform reactive monitoring into a preventive approach, ensuring the stability and compliance of your environment.
The key to success lies in methodical implementation, rigorous documentation, and intelligent automation. As UTCM evolves toward its final version, the foundations you lay today will allow you to fully leverage its future capabilities.


